Disclosure: We may earn a small commission if you choose to buy a product through links on our site. Learn...
Menu
Disclosure: We may earn a small commission if you choose to buy a product through links on our site. Learn more
 Klara Nilsson | Updated on June 17, 2023
Home » Knitting Guides » Knitting Cast-On Methods Explained
Here you’ll find 15 different ways to cast-on in knitting. We’ve listed each technique with its name, a brief description, and a video tutorial. Whether you’re looking to compare common knitting cast-on methods or learn a specific technique, you’ll find everything you need to learn the most popular types of knitted cast-on from scratch.

Casting-on will probably be the first thing you ever do in your knitting journey – but the learning doesn’t stop there.
There are dozens of different cast-on methods that you’ll come across as you branch out into more complicated patterns and techniques. Each method suits different projects, purposes, and stitches, and everybody has their favorite.
While it may seem like there are hundreds of different ways to cast-on in knitting, many of these are actually variations of the same common cast-on techniques. These methods are known by different names all over the world, but they share many of the same techniques.
To help you out, we’ve created this guide listing the most common cast-on methods in knitting, along with a short description and video tutorial. You’ll find out how to complete each cast-on method, their advantages and disadvantages, and what they’re typically used for.
We’ve also compared each cast-on method so you can see which one’s best for you at a glance.
If you’re just beginning a new pattern and there’s a type of cast-on you’re not familiar with, use this guide to help you figure it out. Otherwise, use it to get familiar with all of the different styles and techniques that await you as you progress with your knitting skills.
Summary: 15 Common Knitting Cast-On Methods
Here’s an overview of the different knitting cast-on methods we’ve covered in this guide. Click the name of any method to jump to the section and read its description.
It doesn’t matter which cast-on technique you learned when you first started knitting – there is always a method that’s easier, faster, or better suited to your current project. Put simply, there’s no reason to limit yourself to the most basic cast-on methods, and there’s no ‘wrong’ answer.
Have a look through the methods we’ve listed here and pick a technique that looks like it will give you the results you need. You’ll learn as you go which methods suit particular projects and stitches, but we’ve listed the information below too.
Note: Casting-on is a core skill in knitting, and everyone has their own opinion. We’ve included the most common methods on this page with step-by-step instructions, but if you think we’ve got something wrong, please let us know.
What Is a “Cast-On” In Knitting?
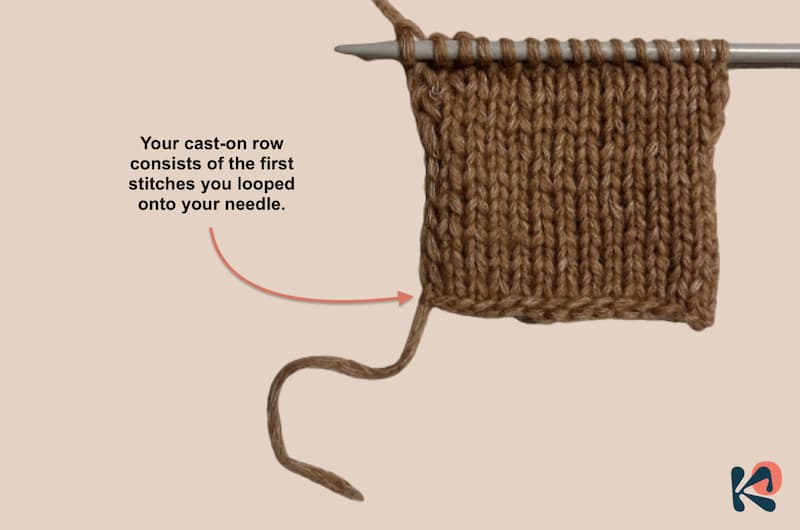
In knitting, “casting-on” refers to the process of adding brand new stitches to your needle. These stitches do not depend on any previous stitches, and will usually become the first row in your knitting project.
All knitting starts with casting-on. Put simply, it turns a strand of loose yarn into a series of loops that sit comfortably on your needle, from which you can start knitting.
Learning how to cast on is the first challenge a beginner knitter will face. There are dozens of different ways to do it, but it’s not uncommon to only know one: the method you were taught when you first learned how to knit.
At the most basic level, all of these different methods achieve the same thing: adding loops of yarn onto your needle until you’ve reached the desired number of stitches. From here, you can begin your knitting.
In fact, you’ll find that many knitting patterns don’t specify which cast-on method to use at all. Instead, they just say “cast on 10 stitches”. In this case, it’s up to you to decide which cast-on method to use, and which one you prefer.
The most common, general-use cast-on method for beginning a project is the long-tail cast-on. It’s fast, easy, and generic enough to use with almost any pattern.
Short-Tail & Long-Tail: The Two Main Types of Cast-On
Every cast-on method falls into one of two types: short-tail cast-ons and long-tail cast-ons.
Long-tail cast-ons involve two strands of yarn: the working piece and a long “tail” piece. This means you can only use them at the very beginning of your project, as you’ll only have one strand of yarn available once you’ve gotten started.
It’s recommended to use a long-tail cast-on for projects where you’ll be casting-on a large number of stitches. They’re fast, easy, and suitable for general use.
The main challenge is calculating how much tail yarn you’ll need: too much and you’ll waste your yarn, too little and you won’t be able to add the right number of stitches.
By contrast, short-tail cast-ons only require one strand of yarn, and they can be used anywhere in your project. If you’re in the middle of your pattern and you need to cast on more stitches, you’ll need to use a short-tail cast-on.
It’s technically possible to start your project with a short-tail cast-on, but it’s not common practice. Most knitters only do so if they’re going for a particular appearance, or if the fabric is intended to be reversible.
Note: There are multiple types of cast-on that fall into the “long-tail” category because they involve two strands of yarn. However, you’ll also see patterns refer to the “long-tail cast-on” as a specific method in its own right. We explain this basic long-tail cast-on later on in this guide.
Knitting Cast-On Methods Compared
In the table below, you can compare the most common cast-on techniques based on their difficulty level, type, speed, stretchiness, and more. We’ve also listed the types of project each method is best for, along with other known aliases.
To skip to our step-by-step instructions and video tutorials for each method, jump to the section later on in this article.
| Cast-On Method | Common Names | Difficulty Level | Speed | Stretchy | Best For |
|---|---|---|---|---|---|
| Long-Tail Cast-On | Double Cast-On, Continental Cast-On | Easy | Fast | Medium | General Use |
| Backwards Loop Cast-On | Thumb Cast-On | Easy | Fast | Medium | Casting-on in the middle of a row |
| Single Cast-On | Wrap Cast-On, Loop Cast-On | Easy | Fast | Medium | Subtle cast-on edge |
| Knitted Cast-On | Knitting On | Easy | Slow | Medium | Beginners |
| Cable Cast-On | N/A | Medium | Slow | No | Firm cast-on edge |
| Provisional Cast-On | N/A | Medium | Medium | N/A | Casting-on temporary stitches |
| Stretchy Cast-On | German Cast-On, Norwegian Cast-On | Medium | Fast | Yes | Stretchy edges |
| Picot Cast-On | Frilled Cast-On, Picot Hem | Medium | Slow | No | Decorative edges |
| Pinhole Cast-On | Magic Loop Cast-On | Medium | Medium | Medium | Knitting in the round from a central point |
| Tubular Cast-On | N/A | Hard | Slow | Yes | Ribbing |
| Turkish Cast-On | Eastern Cast-On | Hard | Medium | Medium | Toe-up socks |
| I-Cord Cast-On | N/A | Medium | Slow | No | Rounded edges |
| Chinese Waitress Cast-On | N/A | Hard | Medium | Yes | Reversible projects |
| Figure 8 Cast-On | N/A | Hard | Medium | Medium | Small projects on DPNs |
| Two-Color Cast-On | N/A | Easy | Medium | Medium | Decorative Edges |
Which Cast-On Method Is Stretchiest?
Some patterns and projects call for a stretchy edge that you can only produce with certain types of cast-on. If you’re knitting a pair of socks from the cuff down, for example, you’ll need a stretchy edge to make sure the socks fit right.
The German Twisted cast-on, also known as the Norwegian cast-on, is one of the stretchiest cast-on methods in knitting. Similar to the long-tail method, it’s great for creating stretchy cuffs on smaller projects like hats, mittens, and socks.
Other stretchy techniques include the Tubular Cast-On and the Chinese Waitress cast-on. If you’re looking for somewhere in between, the classic Long-Tail cast on is a good middle ground – it’s firm, but still retains some flexibility.
Which Cast-On Method Is Easiest?
For most knitters, the Backwards Loop Cast-On is the easiest method to learn, and it’s often the first cast-on new knitters come across. Also known as the thumb cast-on, it’s an excellent general-purpose technique that creates a loose, thin edge on your fabric.
What’s the Best Cast-On Method In Knitting?
The best cast-on method is the one your knitting pattern recommends. Your pattern designer will have chosen it for a reason, and it’s worth following their instructions if you want your project to turn out similarly. If you’re not familiar with it, read the list of cast-ons below to find out how to do it.
The most popular cast-on method for beginning a knitting project is the Long-Tail Cast-On. It gets stitches on your needle quickly, creates a nice edge, and it’s relatively easy once you’ve mastered it. Even better, you can use it to start almost any project.
Other common cast-ons for general use include the Backwards Loop Cast-On, the Knitted Cast-On, and the Cable Cast-On, all of which are possible with basic knowledge of the knit stitch.
Once you’ve mastered these basic techniques, you’ll be ready to move onto more complex cast-on methods that suit your particular project. At this point, you’ll need to consider which characteristics are most important to you. For example, you might need a stretchy edge, a reversible fabric, or you might just want it to be as fast as possible.
Over time, you’ll learn which methods work with which projects. There’s no “wrong” answer, so why not try them all!
15 Common Knitting Cast-On Methods Explained
In this section, we’ve listed the most important types of cast-on in knitting, along with step-by-step instructions, a tutorial video, and all of the key information you need to know.
You’ll find details about each cast-on method’s advantages and disadvantages, stretchiness, the project’s they’re best for, as well as other popular names they’re known by.
We’ve listed the most common cast-on methods first, as they’ll be the techniques you use the most. Once you’ve mastered these, you’ll be able to move on to the more sophisticated techniques. Now, let’s get started!
Long-Tail Cast-On
| Name | Difficulty Level | Stretchiness | Best For | Also Known As |
|---|---|---|---|---|
| Long-Tail Cast-On | Easy | Medium | General Use | Double Cast-On, Continental Cast-On |
The long-tail cast-on is one of the most popular cast-on methods in knitting. It’s fast, relatively easy to learn, and it works as a great all-purpose cast-on for almost any knitting project.
When you use this technique, your cast-on row will also count as the first row of knitting, which is a useful advantage. You’ll also only need the same size of knitting needle as you’re using for the rest of your project.
It is not the stretchiest cast-on method, but it’s not super sturdy, either. Put simply, it’s a good default cast-on for general use. Just ensure the “tail” strand of your yarn is long enough – if you run out, you won’t be able to add any more stitches.
Here’s how to work the long-tail cast-on, step-by-step:
- Measure out a length of yarn approximately 4 times the planned width of your project. If you’re knitting a scarf that’s 8 inches wide, measure 32 inches from where your yarn ball begins.
- Create a slip knot at this point in the strand of yarn. The slip knot does not count as a stitch in the long-tail cast on.
- Place the slip knot on the needle. You’ll now have two strands of yarn – the “working yarn” (attached to the yarn ball) and the “yarn tail” (from your needle to the end of the yarn thread).
- Lay the working yarn around your left thumb, and the yarn tail between your index finger and middle finger. Your hand should be shaped like a water pistol, and the yarn should be in a loose diamond shape.
- Insert your needle under the strand that is wrapped around your thumb, then bring it back over and scoop up the tail yarn around your index finger.
- Bring the yarn through the loop around your thumb, then remove your thumb from the loop.
- Pull the yarn to tighten the new stitch.
- To make more stitches, loop the working yarn back around your thumb and repeat this process.
Here’s a video explaining how to do the long-tail cast-on:
Backwards Loop Cast-On (aka Thumb Cast-On)
| Name | Difficulty Level | Stretchiness | Best For | Also Known As |
|---|---|---|---|---|
| Backwards Loop Cast-On | Easy | Medium | Casting on in the middle of a row | Thumb Cast-On |
Also known as the “Thumb Cast-On”, this is the best method for casting on stitches in the middle of a row. It’s used in other circumstances too, but it can be easy for stitches to fall off your needle, so it’s not recommended for projects that require a large number of cast-on stitches, or projects where you’ll be moving the cast-on stitches from one needle to another.
The backwards loop cast-on is actually a variation of the long-tail cast-on we explained above. It follows a similar process, but it uses a thumb instead of one needle. This means you can cast on much faster than you can with two needles, and it’s easy too.
For this reason, this is one of the fastest cast-on methods once you’ve mastered the technique.
Here’s how to work the backwards loop cast-on:
- Create a slip knot. This is your first cast-on stitch.
- Place the working yarn over your thumb to create a loop.
- Insert your right needle under the yarn at the bottom of your thumb to transfer the loop to the needle.
- Pull to tighten your new stitch.
- Repeat the process until you have casted-on your desired number of stitches.
Watch the video below for a tutorial on the backwards loop cast-on:
Single Cast-On (aka Wrap Cast-On)
| Name | Difficulty Level | Stretchiness | Best For | Also Known As |
|---|---|---|---|---|
| Single Cast-On | Easy | Medium | Subtle cast-on edge | Loop Cast-On, Wrap Cast-On |
The single cast-on method is very similar to the backwards loop technique. It’s quick, reasonably stretchy, and easy for beginner knitters to learn. It looks more or less the same, but the construction method is slightly different.
This method is best for lace patterns and other projects that require a subtle cast-on edge that blends in with the rest of your knitting. It can be difficult to maintain your tension though, which is its one disadvantage.
Here’s how to do the single cast-on:
- Create a slip knot and slide it onto your needle. Pull to tighten.
- Place the working yarn around your thumb to create a loop.
- Hold the remaining strands of yarn with your ring and pinky fingers.
- Insert your needle through the loop around your thumb.
- While holding the needle, wrap the tail of yarn around the top of your needle.
- Slip the loop off your thumb and onto the needle.
- Repeat the process until you’ve casted-on the right number of stitches.
You can find instructions for the single cast-on in the video below:
Knitted Cast-On
| Name | Difficulty Level | Stretchiness | Best For | Also Known As |
|---|---|---|---|---|
| Knitted Cast-On | Easy | Medium | Beginners | Knitting On |
The knitted cast-on is another easy method for beginners. It works for all types of knitting project, is quite stretchy, and has the added benefit of teaching you the knit stitch, too.
You don’t need to leave a yarn tail when using the knitted cast-on. It can be used to cast on at the start of your knitting, in the middle of a row, and at the end of a row.
Though it’s versatile and easy to learn, the knitted cast-on uses two needles, which means it can be slow to finish compared to some other popular methods. It’s a good basic technique to start with, but most knitters move on eventually.
Here’s how to do the knitted cast-on:
- Create a slip knot and place it on your left-hand needle.
- Insert your right-hand needle into the slip knot from below, bringing it under the left needle.
- Wrap the working yarn around the tip of the right needle to create a loop.
- Twist the loop on your right needle up and drop it onto the left needle.
- Pull the yarn to tighten the loop. These are your first two stitches.
- Repeat this process for more stitches.
Watch the video below to learn how to do the knitted cast-on in more detail:
Cable Cast-On
| Name | Difficulty Level | Stretchiness | Best For | Also Known As |
|---|---|---|---|---|
| Cable Cast-On | Medium | Low | Firm cast-on eddge | N/A |
The cable cast-on is very similar to the knitted cast-on, but the process of adding new stitches is slightly different. Instead of knitting into the previous stitch, you pull the loop from between the previous stitches to create a new one.
This produces a sturdy, neat edge that isn’t very stretchy and looks a bit like a knitted cable. It’s great for visible hems or edges that need to be strong, but it’s not recommended for hats or cuffed projects that need to be somewhat flexible.
You can use the cable cast-on in the middle of a row, and it’s not overly complex. Watch out for your tension if you’re a beginner, though – if your stitches get too tight, it’ll be difficult to cast new ones on.
Here’s how to do a cable cast-on in knitting:
- Create a slip knot and place it on your left-hand needle.
- Insert your right-hand needle from below, bringing it under the left needle.
- Wrap the working yarn around the tip of the right needle to create a loop.
- Twist the loop on your right needle and drop it onto the left needle to form two stitches.
- Insert your right-hand needle between the yarn that connects these two stitches.
- Wrap the yarn around the right-hand needle and over to create a new loop.
- Pull this loop up and drop it onto the left-hand needle, releasing it from the right needle.
- Repeat until you have enough stitches.
Here’s a video demonstrating how to do the cable cast-on method:
Provisional Cast-On
| Name | Difficulty Level | Stretchiness | Best For | Also Known As |
|---|---|---|---|---|
| Provisional Cast-On | Medium | N/A | Casting-on temporary stitches | N/A |
The provisional cast-on is used to add stitches that you can knit from later on in the project. It essentially creates a temporary cast-on edge with live stitches that you can return to in the future.
This is useful if you need to pick up your cast-on stitches to knit a border, to continue knitting in the opposite direction, or to join two pieces of fabric together. You might use it for necklines, knitted cuffs, or projects with an invisible seam.
The cast-on starts with a small chain of crochet that’s worked into the knitting. When you’re ready, you can pull out the crochet chain and you’ll have live stitches from which you can start knitting your next row.
The method below uses scrap yarn to create the crochet chain. If you do it without the scrap yarn, it’s called the crocheted cast-on instead.
Here’s how to do the provisional cast-on:
- Using scrap yarn, crochet a chain that’s five or more stitches longer than your project.
- Break off the yarn, then bring the yarn tail through the last chain.
- Insert your needle through the first round ‘bump’ to pick up stitches in the back of the crochet chain.
- Continue until you have the same number of bumps on your needle as you need stitches.
- From here, you can begin knitting with the yarn you’ll use for your project.
- When you’re ready, you can remove the crochet chain and knit from your cast-on stitches.
Use the video below to learn this provisional cast-on method in more detail:
Stretchy Cast-On (aka German Twisted or Norwegian Cast-On)
| Name | Difficulty Level | Stretchiness | Best For | Also Known As |
|---|---|---|---|---|
| Stretchy Cast-On | Medium | High | Stretchy edges | German Cast-On, German Twisted Cast-On, Norwegian Cast-On |
Also known as the German Cast-On, the Twisted German Cast-On, and the Norwegian Cast-On, the Stretchy Cast-On is similar to the long-tail method but – as the name suggests – stretchier. It’s neat, relatively simple, and gets stitches on your needle quickly.
As with all long-tail methods that use two strands of yarn, you need to make sure you make the tail-end long enough. Most knitters take a length of yarn from their ball, split this in half, then cast on at that point in the thread.
This method gets its stretchiness from an extra twist that adds elasticity to the cast-on edge. This makes it a great cast-on for socks, mitten knitting patterns, and other cuffed projects. It’s also one of the best methods to use with the garter stitch.
Here’s how to work the stretchy (German) cast-on:
- Just like in the long-tail method, measure your yarn out and create a slip knot at your desired point.
- Place the slip knot on your left needle.
- Position your fingers as you would for the long-tail cast-on, with your index finger and thumb holding the two strands of yarn in a rough diamond shape.
- Place your right-hand needle under the two strands of yarn that come out from either side of your thumb. This will create a small loop by your thumb.
- Insert the tip of the needle over and into the loop by your thumb.
- Turn your hand so your index finger is pointing away from you.
- Wrap the needle around the top strand of yarn on your index finger, moving the needle over then under.
- Insert the needle through the small loop that’s now between the yarn strands on your thumb.
- Let go of the yarn and pull to tighten the new stitch.
- Repeat as many times as needed.
Here’s a video showing how to knit the stretchy German cast-on:
Picot Cast-On
| Name | Difficulty Level | Stretchiness | Best For | Also Known As |
|---|---|---|---|---|
| Picot Cast-On | Medium | Low | Decorative edges | Frilled Cast-On, Picot Hem |
The Picot Cast-On is a decorative method that adds ‘frilled’ edging to your fabric. These frills consist of small bumps that are made by binding-off stitches in the cast-on process. They look great on knitted blankets and projects for babies, too.
The decorative edging makes the Picot Cast-On slightly slower and more complicated than other more traditional cast-on methods, but it’ll be much quicker if you’ve been knitting for a long time.
It’s worth it if you’re looking to try something new or add something unique to your project, but by no means is this a necessary technique for beginners!
Here’s how to do the Picot Cast-On:
- Create a slip knot and place it on your needle. This is your first cast-on stitch.
- Cast on five stitches using the cable cast-on method explained above.
- Bind off two of these stitches, then place the remaining stitch back on the left needle.
- Cast on another four stitches.
- Repeat step 3.
- Repeat step 4.
- Repeat step 3.
- Continue until you’ve reached the desired number of stitches.
You can also watch the video below to learn how to do the Picot Cast-On method:
Pinhole Cast-On (aka Magic Ring Cast-On)
| Name | Difficulty Level | Stretchiness | Best For | Also Known As |
|---|---|---|---|---|
| Pinhole Cast-On | Medium | Medium | Knitting in the round from a central point | Magic Ring Cast-On |
The pinhole cast-on is typically used to begin projects that are knitted outwards from a central point. It’s a closed cast-on technique that’s great for knitting hats from the top down, socks from the toe up, or other similar patterns.
It works by casting-on stitches around a loop of yarn which is then pulled tightly to close the hole in the middle. These stitches can then be worked from in the round.
Here’s how to do the Pinhole Cast-On:
- Leaving a small tail, wrap your yarn twice around your left index finger. The working yarn should come from the left and over your finger, while the yarn tail should drape to your right.
- At this point, you should have two loops of yarn around your finger.
- Insert a crochet hook from the right-hand side and under the two loops.
- Grab the furthest loop and pull it through the second loop.
- Grab the yarn again and pull it through the loop you’ve just created.
- This is your first stitch. Continue this process until you’ve cast-on as many as you need.
- Once you’ve reached your stitch count, transfer them to your double pointed knitting needles until you have a square of yarn with a hole in the middle.
- Pull on the yarn tail to close the hole up completely.
In the video below, you can find more detailed instructions for the Pinhole Cast-On:
Tubular Cast-On
| Name | Difficulty Level | Stretchiness | Best For | Also Known As |
|---|---|---|---|---|
| Tubular Cast-On | Hard | High | Ribbing | N/A |
If you’re looking for a way to cast-on ribbing with a nice neat edge, then the tubular cast-on is the method for you.
Although it’s more complicated than some of the other cast-on methods in this list, this technique is definitely worth having in your knitting skill set. It produces a stretchy, almost elasticated edge that looks great with 1×1 or 2×2 ribbing, but also works well for similar stitch patterns.
You’ll find that projects started with the tubular cast-on end with a subtle, “rolled-over” edge that’s less clearly-defined than it would be when using a different method. Combined with its stretchiness, this makes it an excellent cast-on for socks, hats, collars, and other cuffed projects.
Here’s how to knit the Tubular Cast-On:
- Measure out your yarn and create a slip knot as if you were doing the long-tail cast-on.
- Place the slip knot on your needle and position your fingers as you would for the long-tail cast-on.
- With your index finger pointing away from you, bring your needle underneath the yarn on your index finger and over the yarn on your thumb.
- Rotate the needle so it’s back in the position you started in. This is your purl stitch.
- For your knit stitch, do the opposite. Bring your needle underneath the yarn on your thumb and over the yarn on your index finger.
- Repeat until you’ve reached your desired number of stitches. You should see both knit and purl stitches in your cast-on row.
- To complete the cast-on, you need to double knit some setup rows to finish the tubular edge.
- To do this, slip the purl stitches and then knit into the back of the knit stitches.
- Repeat until you’ve worked all of the stitches.
Follow the video below to learn the tubular cast-on method:
Turkish Cast-On
| Name | Difficulty Level | Stretchiness | Best For | Also Known As |
|---|---|---|---|---|
| Turkish Cast-On | Hard | Medium | Toe-up socks | Eastern Cast-On |
The Turkish cast-on is a way to create a neat, nearly invisible edge for projects that are worked in the round. It’s commonly used for knitting socks from the toe up, but it can also be used for any project that’s knitted in the round with relatively few stitches and a seamless edge.
It works by looping the yarn around two parallel needles and then knitting each loop twice. This makes a seamless beginning for small projects like mittens, socks, and hats – particularly if you’re using the magic loop method.
Here’s how to do the Turkish Cast-On:
- Create a slip knot and place it on your needle.
- Place your two circular needles parallel to each other horizontally, with the slip knot needle at the bottom.
- Wrap the working yarn around both needles half as many times as you need stitches. If you need 10 stitches, wrap the yarn 5 times.
- Pull out the bottom needle from the yarn.
- Hold this needle in your right hand and use it to knit into the stitches on the other needle until you’ve reached the end of the row.
- Turn the needles 180 degrees so that the slip knot is on the top right-hand side, then pull the cable of the top needle back through the stitches.
- Now pull the bottom needle out and use it to drag the slip knot off the top needle.
- Use the bottom needle to knit into the top row of stitches until you’ve reached the end of the row.
- Turn the needles 180 degrees again and repeat the process, working one more round.
- With your bottom needle free, you can now begin knitting rounds for your project.
For a tutorial on the Turkish Cast-On, watch the video below:
I-cord Cast-On
| Name | Difficulty Level | Stretchiness | Best For | Also Known As |
|---|---|---|---|---|
| I-Cord Cast-On | Medium | Low | Rounded edges | N/A |
The I-Cord cast-on is a decorative technique that creates a neat piping effect along your knitted edges. It’s worked by knitting an i-cord from which you pick up stitches.
Though it’s slow to work, this is an excellent way to add a professional trim to your projects. It can be used for normal borders, the top of knitted pockets, or even the brim of a hat.
Here’s how to knit the I-Cord Cast-On:
- Cast on three stitches using the long-tail cast-on method.
- Slip these stitches over to your left-hand needle.
- With the working yarn behind your cast-on stitches, knit two stitches and then knit through both sides of the third stitch.
- Slip all four stitches back over to your left-hand needle.
- Repeat this process until you’ve got the right number of stitches. Each repeat will add one stitch.
Take a look at the video below for more detailed instructions on the I-Cord Cast-On:
Chinese Waitress Cast-On
| Name | Difficulty Level | Stretchiness | Best For | Also Known As |
|---|---|---|---|---|
| Chinese Waitress Cast-On | Hard | High | Stretchy, reversible edge | N/A |
The Chinese Waitress Cast-On is stretchy and fully reversible. It creates a double-sided chain of cast-on stitches along the edge that looks similar to the I-cord cast-on, but less chunky.
Although it’s a little complicated, this method is an excellent choice for socks, sweater hems, and other projects that need to be reversible and elastic.
Just like the Turkish Cast-On, the slip knot doesn’t count as a stitch in this method. That means you can slip it off your needle as soon as you don’t need it anymore.
Here’s how to do the Chinese Waitress Cast-On:
- Create a slip knot and place it on your needle.
- Make an ‘X’ shape with your two needles by crossing the left over the right.
- Holding the yarn in your right hand, wrap the working yarn over the left needle and around the back of the right needle.
- Pull your right-hand needle down and bring the loop of yarn under the two existing loops, and onto your right needle.
- Remove the right needle and use your fingers to pull and twist the loop around.
- Reinsert your right needle and cross the left needle across it again.
- Repeat this process once more, but this time pull the loop of yarn under the stitch you just created.
- Repeat this process until you’ve cast-on your desired number of stitches.
- Place the last stitch on your needle and use the working yarn to secure it.
Here’s a useful video explaining how to do the Chinese Waitress Cast-On in more detail:
Figure 8 Cast-On
| Name | Difficulty Level | Stretchiness | Best For | Also Known As |
|---|---|---|---|---|
| Figure 8 Cast-On | Hard | Medium | Small projects on DPNs | N/A |
Commonly used for knitting socks from the toe-up, the Figure 8 Cast-On is a provisional cast-on that’s similar to the Turkish Cast-On, but better for projects with a larger number of stitches.
It requires double-pointed or circular needles in the same size you’ll use for the rest of your project.
Despite its reputation for being difficult, it’s great for making invisible, seamless starts to smaller projects like socks, mittens, and hats. It’s named after the way you wrap your yarn around your needles in the shape of the number eight.
Here’s how to do the Figure 8 Cast-On:
- Create a slip knot and place it on your needle.
- Place your two circular needles parallel to each other horizontally, with the slip knot needle at the bottom.
- Bring the working yarn underneath and around the top of both needles, then lay it between the two needles.
- You should now have one loop on the top needle, and the slip knot on the bottom.
- Now wrap the working yarn around the bottom needle and lay it between the two needles.
- Repeat this process until you have the same number of loops on each needle as you need stitches.
- Pull the bottom needle out of the stitches you’ve created. They should be resting on your circular needle until you need to return to them.
- You can know knit as normal from the top row of stitches you’ve created.
Take a look at the video below for a full tutorial on the Figure 8 Cast-On:
Two-Color Cast-On
| Name | Difficulty Level | Stretchiness | Best For | Also Known As |
|---|---|---|---|---|
| Two-Color Cast-On | Easy | Medium | Decorative edges | N/A |
The two-color cast-on is a decorative cast-on that works to add a special touch to the edge of your projects. Similar to the long-tail cast-on in difficulty level, it’s best suited to double knitting projects as it allows you to start knitting with two colors from the first row. However, you can use it with any pattern you like – even if the rest of the pattern is only in one solid color.
The final result of this cast-on adds a subtle contrasting color to the stitches along your knitted edge.
Here’s how to do the Two-Color Cast-On:
- Take two strands of yarn in contrasting colors and knot them together. You can undo this knot once you’ve fully cast-on.
- Holding the two strands of yarn parallel to each other, take two needles and insert them both between the strands of yarn, next to the knot.
- Make sure the color you’d like as your first stitch is positioned at the back of the work.
- Position your fingers as you would in the long-tail cast-on, with the back yarn over your index finger, and the front yarn over your thumb facing towards you.
- Bring the tips of both needles under the thread on your thumb and up through the two strands to create a loop.
- Now bring the tips of both needles over to the strands on your index finger and pull a loop through the loop on your thumb and onto your needles.
- Repeat this process but in reverse to cast-on a stitch in your second color. You’ve now cast-on one stitch in each color.
- Continue this process until you reach the desired number of stitches.
- Undo the knot you created at the beginning and remove the second needle.
- You can now start knitting your first row.
Here’s a video showing you how to do the Two-Color Cast-On method:
How to Cast-On In the Middle of a Row
As you knit a variety of projects, you may find a time where you need to cast on stitches in the middle of a row. This can be necessary for knitting button holes, creating pockets, or simply to add some extra depth to your fabric.
The easiest way to cast-on stitches in the middle of a row is to use the backwards loop method or the cable cast-on method.
If you find yourself in this situation, here are step-by-step instructions for how to cast on in the middle of a row:
- Keep knitting normally until the point where you need to cast-on additional stitches.
- Turn the fabric so you’re facing the wrong side of your knitting.
- Insert your right needle between the first two stitches.
- Bring the yarn around and under the needle, then pull the loop through.
- Drop the loop into your left-hand needle.
- Continue this process until you have enough additional stitches.
- Flip the fabric so you’re facing the right side and continue as your pattern recommends.
FAQs
Long-tail vs Knitted Cast-On: What’s the Difference?
The main difference between the long-tail cast-on and the regular “knitted” cast-on is how many strands of yarn they involve.
The long-tail cast-on uses two strands of yarn: the “working” yarn attached to the ball, and the “yarn tail” which runs from your needle until the end of the thread. It’s quick to work through and it counts as the first row of your knitting. More importantly, it can only be used at the start of your project.
In contrast, the knitted cast-on is a short-tail cast-on, which means it uses just one strand of yarn. It uses two needles much like knitting a normal stitch, which means it can be slower than some variations of the long-tail method. When you use the knitted cast-on, the cast-on row does not count as the first row.
Unlike the long-tail method, the regular knitted cast-on can be used to cast-on at any point in your knitting – at the start, in the middle of a row, and at the end.
How Long Should the Tail Be When Casting On?
If you use a long-tail cast-on, the length of your yarn tail will be incredibly important. Too long and you’ll waste your yarn; too short and you won’t be able to add enough stitches.
As a rule of thumb, you can estimate how long your yarn tail should be by measuring roughly one inch of yarn per cast-on stitch. Alternatively, you can measure out approximately three times the width of the project you’re knitting, with a little extra just in case.
Of course, this will depend on the materials you’re using. Thinner yarn will need a shorter yarn tail, while bulkier yarns will require more. As always, we recommend following your pattern designer’s instructions as closely as possible for the best results.
Should You Cast-On With a Larger Knitting Needle?
If you’re a beginner knitter and you find yourself casting-on stitches too tightly, you may find it useful to try casting on with a larger knitting needle than your project requires. If your cast-on stitches tend to be loose, you can try casting-on with a smaller needle.
This can be a useful trick for some short-tail cast-on methods, but it won’t work in all cases. For example, a larger needle might help loosen your stitches with a knitted or cable cast-on, but it’s unlikely to help much when using a long-tail cast-on.
Every cast-on method in knitting has its own attributes, and some are naturally tighter or looser than others. In time, the best solution is to try more than one cast-on technique so you have a better understanding of what works best for your chosen project.
Eventually, you can work towards knitting with greater control over your knitting tension and gauge, so you can cast-on evenly without worrying about using additional tools.
Related Guides

Yarn Types and Fibers Explained
This guide explains the different types of knitting yarn and how they differ in fiber, material, and usage....
Step by Step Knitting Instructions for Beginners: Your Ultimate Guide
Disclosure: We may earn a small commission if you choose to buy a product through links on our site. Learn...